In order to edit / download tags or rename audio files in mp3Tag Pro, you need to select some files first. This article describes the available options and controls for selecting files.
Select Files
To select a file in the main area, just click it.
Shift + click will select all files between the currently selected one and the one you click while pressing Shift.
Ctrl + click adds the file you click to the selection. If it is already selected, such click removes it from the selection.
Ctrl + A selects all audio files in the current folder. Alternatively, you can use the green checkmark button: ![]()
Navigation
To show some audio files in the main area, you need to select their folder. This can be done in several ways. The most obvious one is selecting folders in the “Folders” area, just like you do in Windows Explorer:
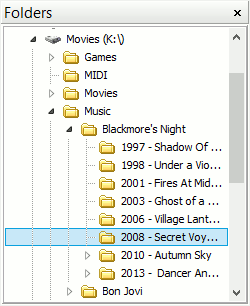
This area shows folders as a tree, you can expand and collapse subfolders as necessary.
Another way (although not the easiest one) would be typing a path into the “Folder” field in the main area manually:
![]()
Next to this field, you can find a folder button. A click on it opens the “Browse for folder” dialog:
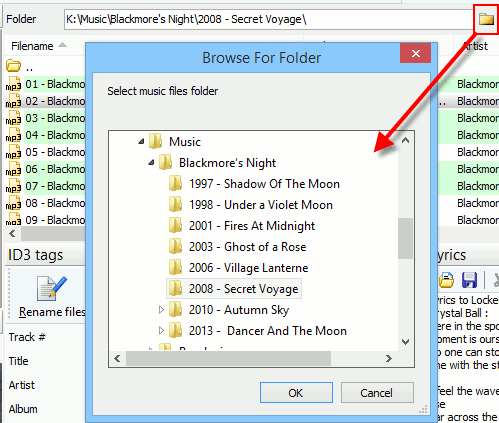
This works in exactly the same way as the “Folders” area and can be useful, if the latter area is hidden.
If you’d like to open some folder shown in the main area, just double click it.
The opposite would be going one level up (to the parent folder). You can do that in different ways:
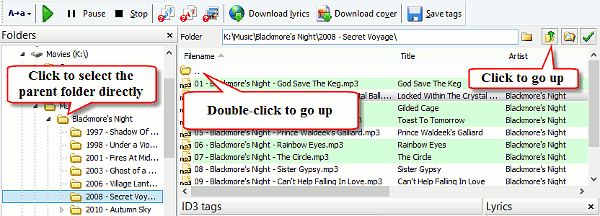
The screenshot above shows 3 options:
- Click the parent folder in the “Folders” area.
- Double-click the “..” entry in the main area.
- Use the “Level up” button in the right upper corner.
It is also possible to edit the “Folder” field manually, removing the part you do not need.
Nested Folders (Subfolders)
In mp3Tag Pro, you can work with files from multiple folders at once. To show files from all nested folders (subfolders), click the “Scan subfolders” button in the right upper corner:
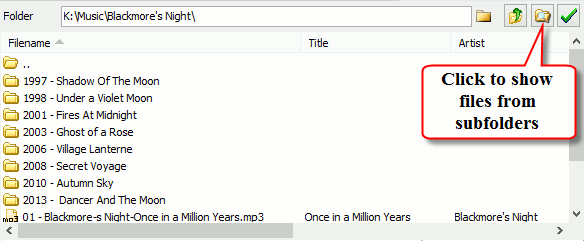
The tag editor reads names and tags (depending on your settings) of your audio files and displays them in the main area:
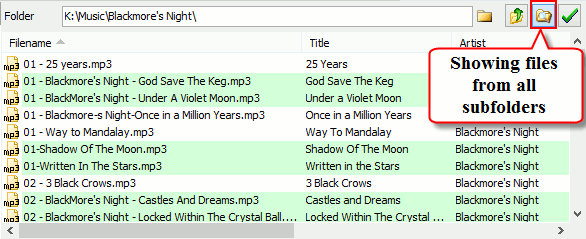
By default, all audio files from all subfolders are shown. But you may want to work with files stored in just a few subfolders of the currently selected folder.
Instead of scanning all subfolders, you can scan only selected folders. Just enable the corresponding option on the “View” tab of the “Settings” window (“File” – “Options” – “View”).
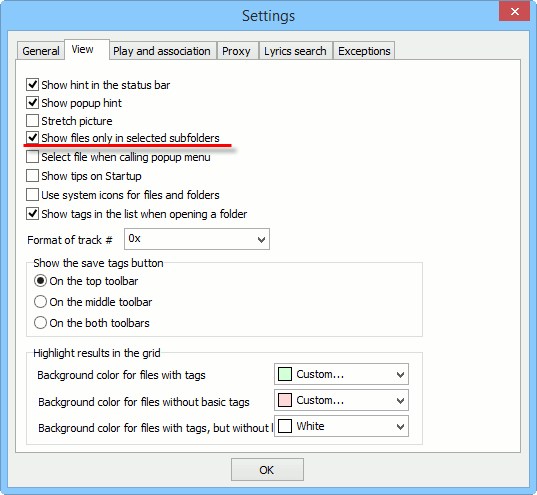
Find “Show files only in selected subfolders” and enable it.
Now highlight some folders in the main area (see the “Select files” section at the top of this page):
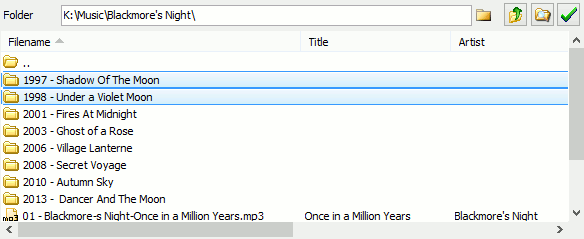
Press the “Scan subfolders” button to show files from the selected folders.
Hint: if you enable this option and click the “Scan subfolders” button without selecting any folders, the main area will be cleared.
To return to the selected folder (stop showing files from subfolders), click the “Scan subfolders” button again.
File Types
mp3Tag Pro supports quite a number of popular audio formats, including MP3, FLAC, APE, M4A, AAC, and others. By default, all supported formats are shown in the main area of the program. However, you can disable or enable showing certain formats. Use the “View” – “Show files” menu:
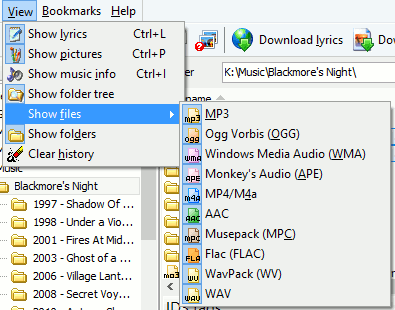
This may be useful if you’d like to keep files in some format unchanged.
Take a look at this menu if your music files aren’t displayed in the main area.
 en
en Italian
 German
 French
 Spanish
 Russian
