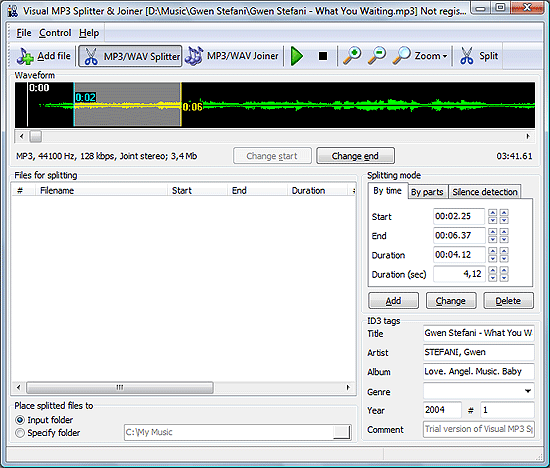
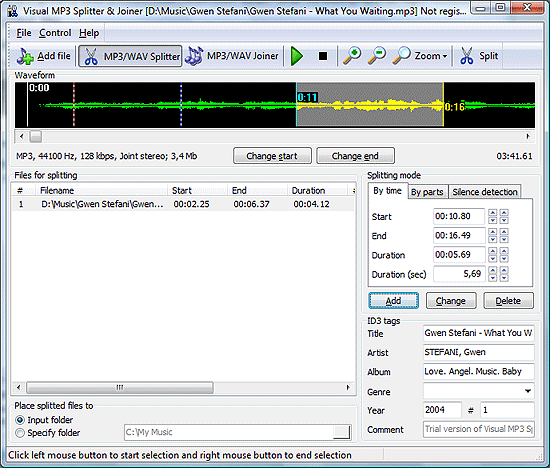
Visual MP3 Splitter & Joiner allows you to split and combine MP3 or WAV files. This section deals with splitting based on time and visual splitting. These two options are closely related, that’s why we cover them together. Splitting by parts is covered in an earlier section. Splitting based on silence will be covered later.
Splitting based on time is pretty straightforward. Switch to the “By time” tab, enter start time/ end time, and click “Add” button. Then repeat the same for each following part.
Alternatively you can set start time and duration of a part. The program will compute the time when the part should end. Accuracy is a hundredth of a second.
If you added some part but later changed your mind about start or end, it is no problem. Pick up the part from the list, correct time, then click either “Change start” or “Change end” button (depends on what you need to change).
Visual splitting allows you to set part’s boundaries directly on the waveform. There are two modes supported by the program. Using the default one, you can set split points in one click.
The other mode allows setting and readjusting split points more exactly. You can select it by clicking the corresponding button on the toolbar and selecting “Precise marking”:

Now, left-click is for setting start time, right-click sets end time of the part. Use the built-in media player to check your guess and to prove if the part contains exactly what you want it to contain.

Whatever option you use, to add the part you’ve just selected into split-list, click the “Add” button on the right pane. Don’t forget to click it when moving to the next part. Otherwise the information about previously set boundaries will be lost and you will need to repeat your steps.

To improve accuracy of visual editing, you can zoom in at the waveform. If such accuracy is not needed and you want to observe more of the waveform, just zoom out. The program can show all the file at once (but it will take some time to build the waveform of it).
When finished with the parts selection, click the “Split” button or save a CUE-Sheet file (if you don’t know what a CUE sheet is, please refer to “What Is CUE Sheet?” section). You can also use batch processing to process multiple audio files at once. Don’t forget to review ID3 tags, if you want them to differ for each extracted part.
 en
en Italian
 German
 French
 Spanish
 Russian